
We’ve had a bunch of folks ask us about what we did for internet and WiFi in our new house.
To be honest, we probably went a bit overboard. I’m sure our builder thought we did! But, I’m super happy with our strategy and how everything turned out.
Cat6 everywhere
The first order of business was to run Cat6 everywhere we could. When your house is primarily concrete, it’s much harder to run cables later. Yes, you can have open conduits, and we do, but it’s still much easier to run cable up front.
Almost every room (except for the bathrooms) has multiple Cat6 drops. In-ceiling drops for WiFi access points, as well as in-wall jacks for wired connections. In addition, we have Cat6 for PoE (Power over Ethernet) cameras.
Server Room
All of our cabling runs to the server room. It’s really a server closet, but whatevs. It’s great. The server room contains a rack with all of our internet, whole-house audio, and smart-home equipment.
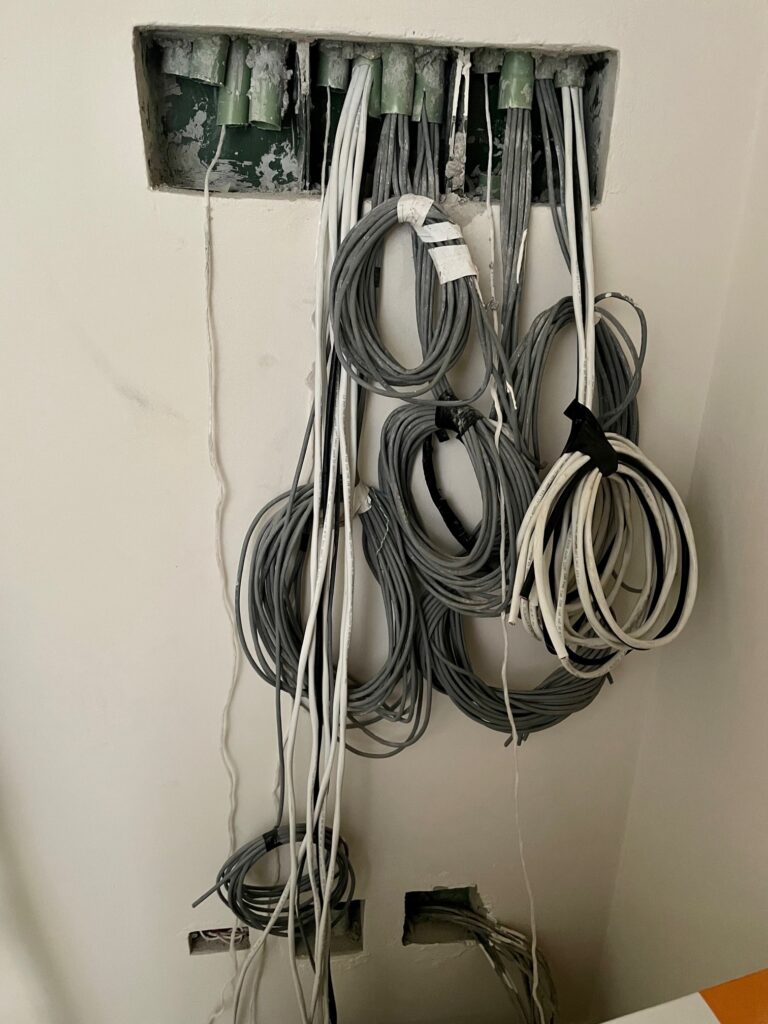
We left an open conduit from the street all the way to the server room, which allowed Telmex (our ISP) to run a fiber optic line the whole way, and the Telmex modem lives in the server room. Our electricians also added pull strings to the conduit (see picture above), which is super helpful, and makes pulling cables so much easier.
The Telmex modem feeds into a UniFi Dream Machine Pro, then into a couple of switches, which control the entire network, and also handles the PoE cameras. The UDM Pro also allows for setting up guest networks, VLANs, traffic routing rules, and a whole boatload more.
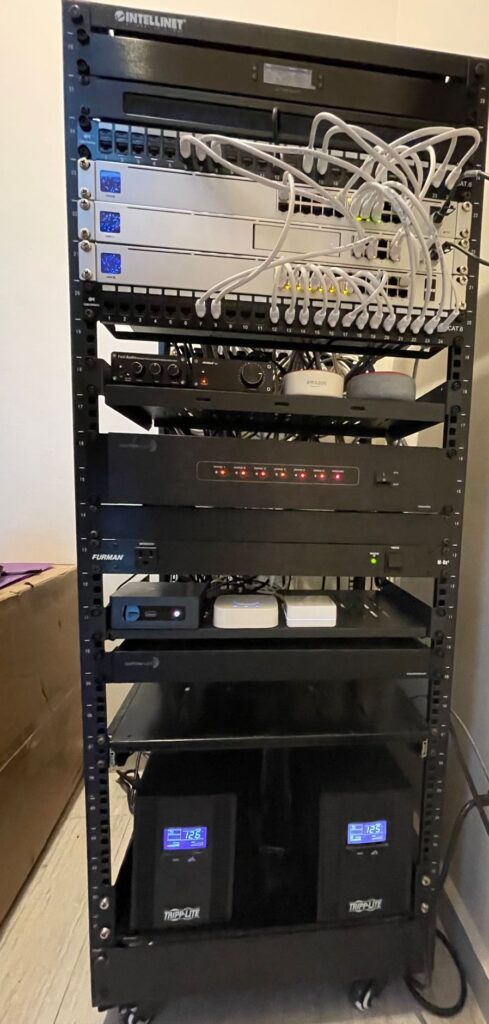
There’s also a couple of UPS units (Uninterruptible Power Supplies), which gives us 2-3 hours of internet access, even when the power goes out. Longer than that, we would fire up the generator; but that’s rare.
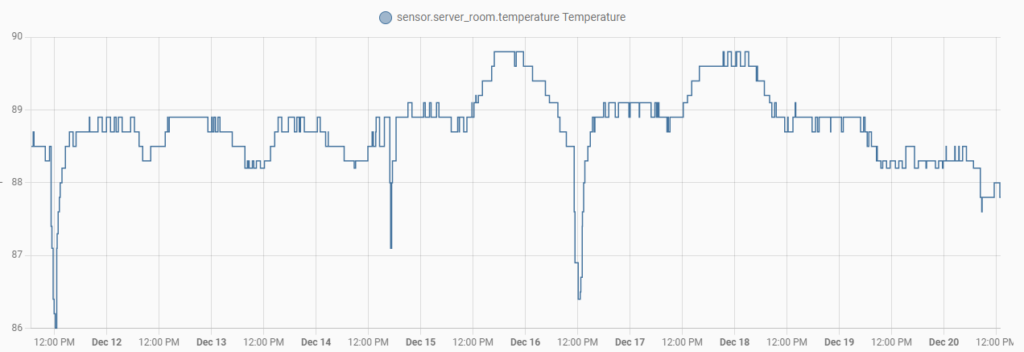
The top of the rack has an exhaust fan to pull hot air up and away from equipment, and the closet also has an exhaust fan. It gets warm in there, but it’s perfectly fine for our equipment, typically less than 90 degrees F. Although when I have all of the amplifiers cranking, it does get over 100 F, but again, still fine for equipment.
WiFi Access Points
We have 5 WiFi access points in the house. One in each office, one in the dining room, one in the master bedroom, and one on the top-floor terrace. The interior ones are all in-ceiling access points, and the terrace one is an indoor-outdoor wall-mounted one.
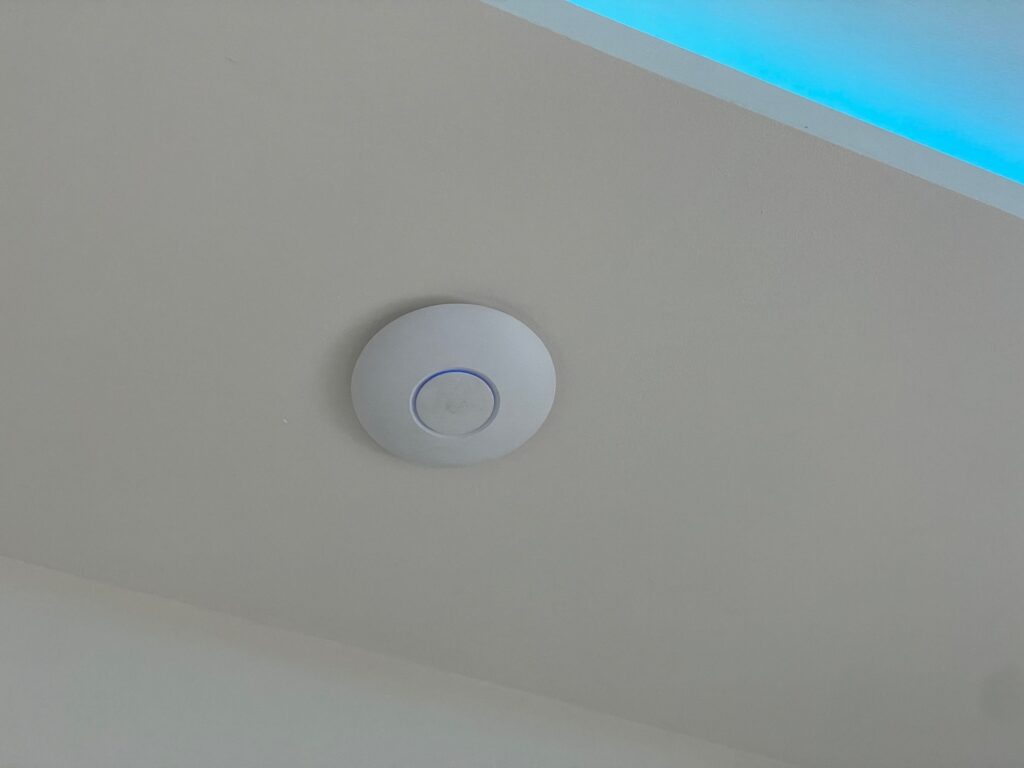
Why so many? So we can have great WiFi wherever we are in the house. With concrete walls, and plenty of rebar inside the walls and floors – WiFi signals become attenuated very quickly. I’ve actually turned down the power of some of them slightly, to prevent overlap, and to allow for smoother device switching, such as when you walk around the house with your laptop or phone.
Wall Jacks
We also have a bunch of Cat6 wall jacks throughout the house. A wired connection is always better than a wireless one. So for devices that don’t move, having a wired connection is better (faster, more stable, and reduces WiFi congestion). We use wired connections for both of our laptops (since they mostly stay in our offices), for the TV, streaming devices, home automation hubs and server, and the Audio-Video receiver.

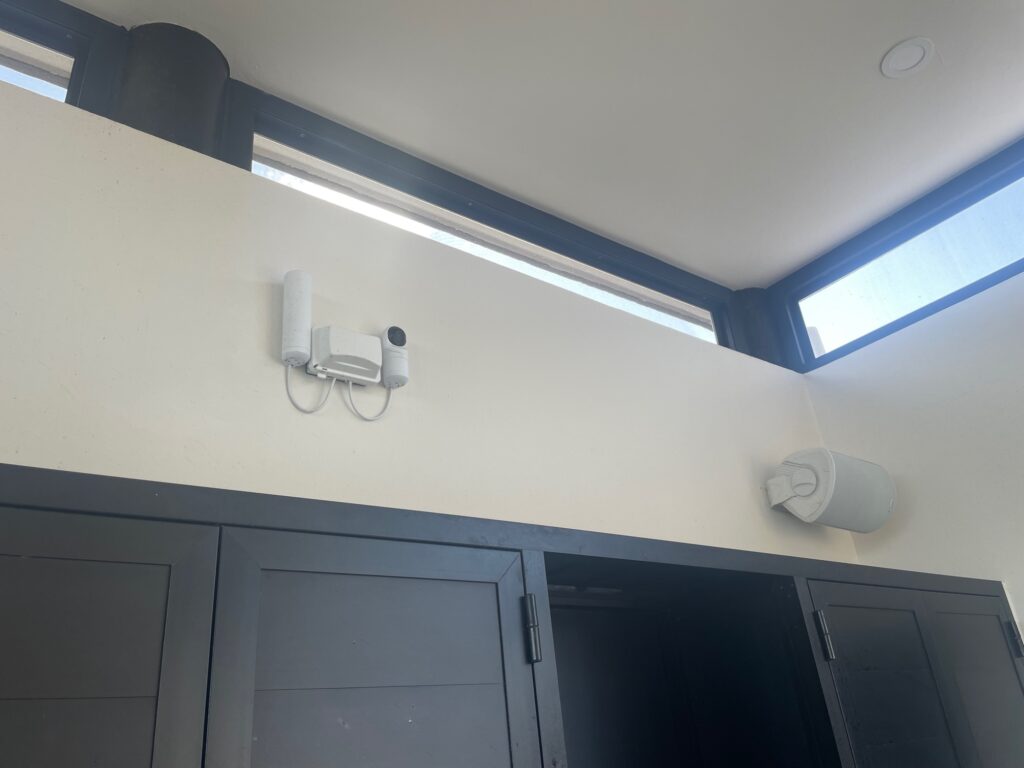
PoE Cameras
We also have our security cameras powered by PoE, which means they only need a Cat6 cable. That one cable carries data and power to the camera. So it’s a better signal, as it’s not WiFi, and it’s constantly powered and recording.
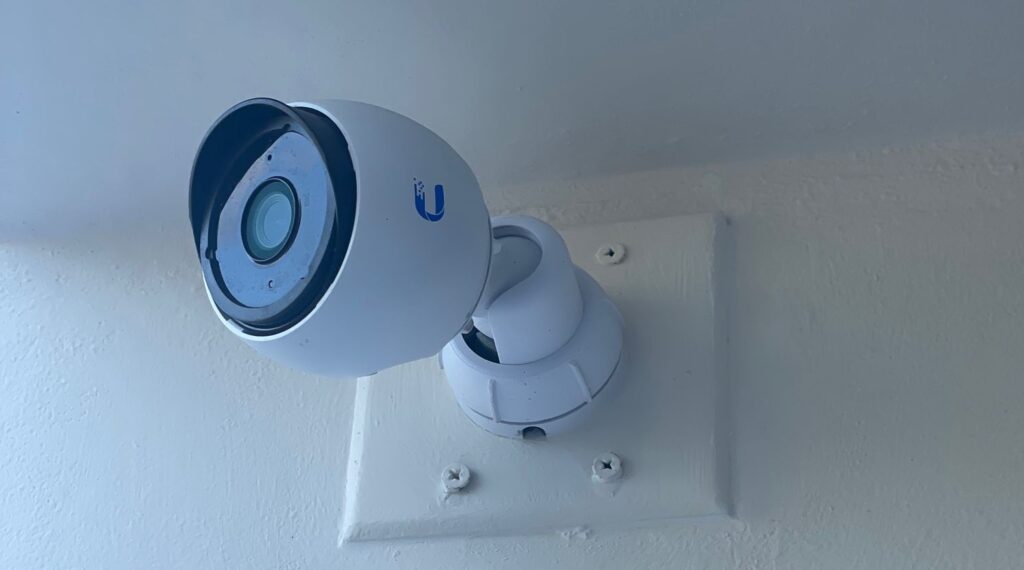
UniFi (Ubiquiti)
As you may have noticed by now, all of my networking equipment is UniFi. Network controller, switches, access points, and cameras. It’s nice having everything work together.
The one thing I don’t have is the UniFi PoE doorbell. Running a Cat6 cable to our doorbell location was something that got missed during construction. So I’ve gone with a different vendor for the video doorbell (more on this in a later post).
Overall I’ve been super happy with my selection, and all of the UniFi gear.
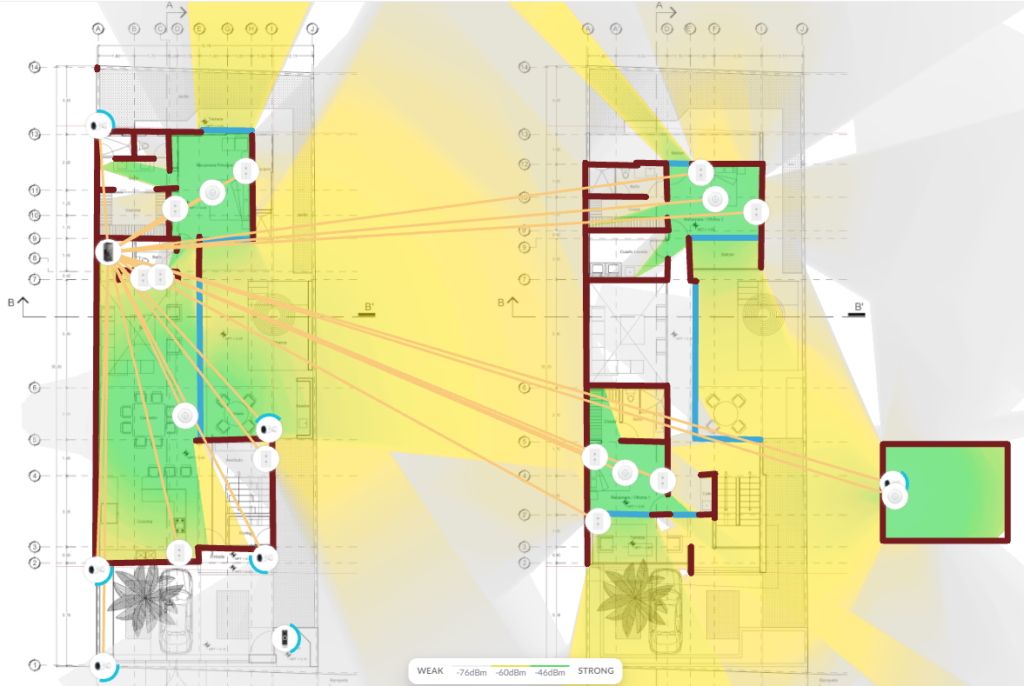
Uniquiti (UniFi) offers a design center tool, which allows you to add your house floor plans, add in your access points, and visualize the WiFi coverage, for both 2.4 and 5 GHz. This helps you decode how many access points to use, and experiment with placement. They also have one for their cameras.
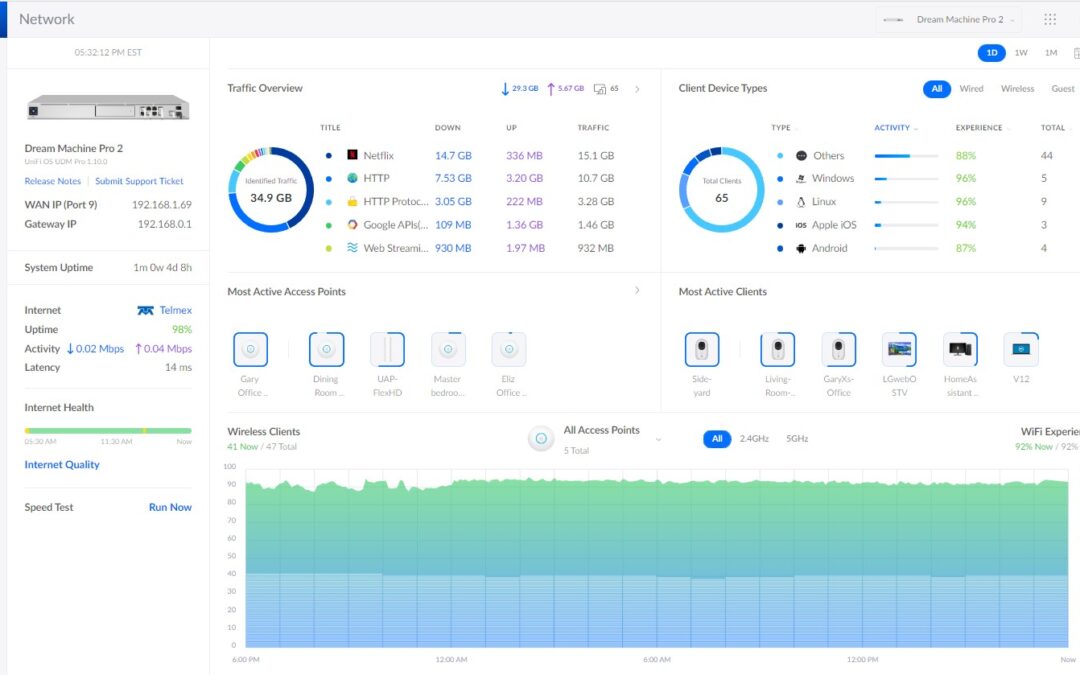
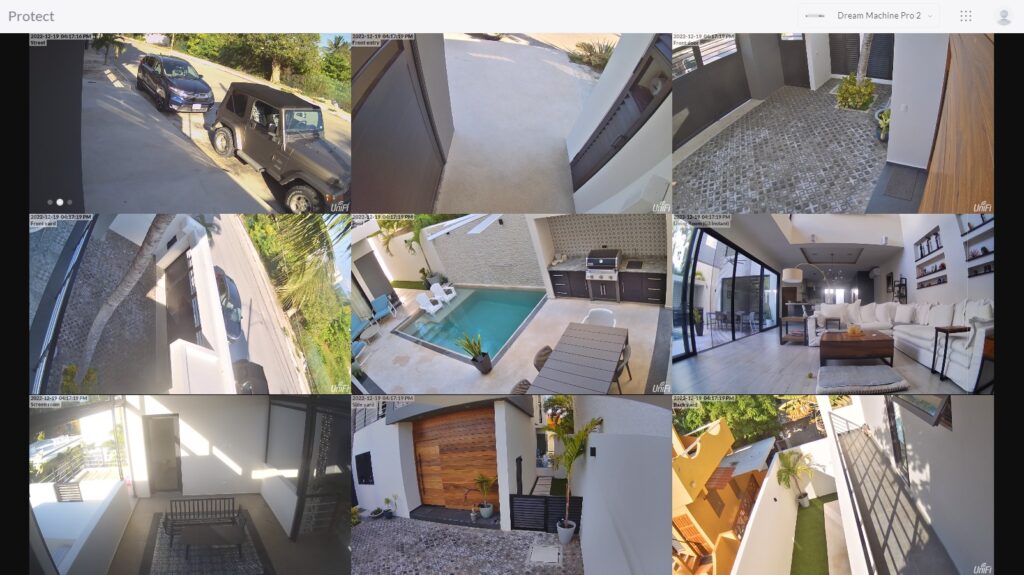
Network Clients
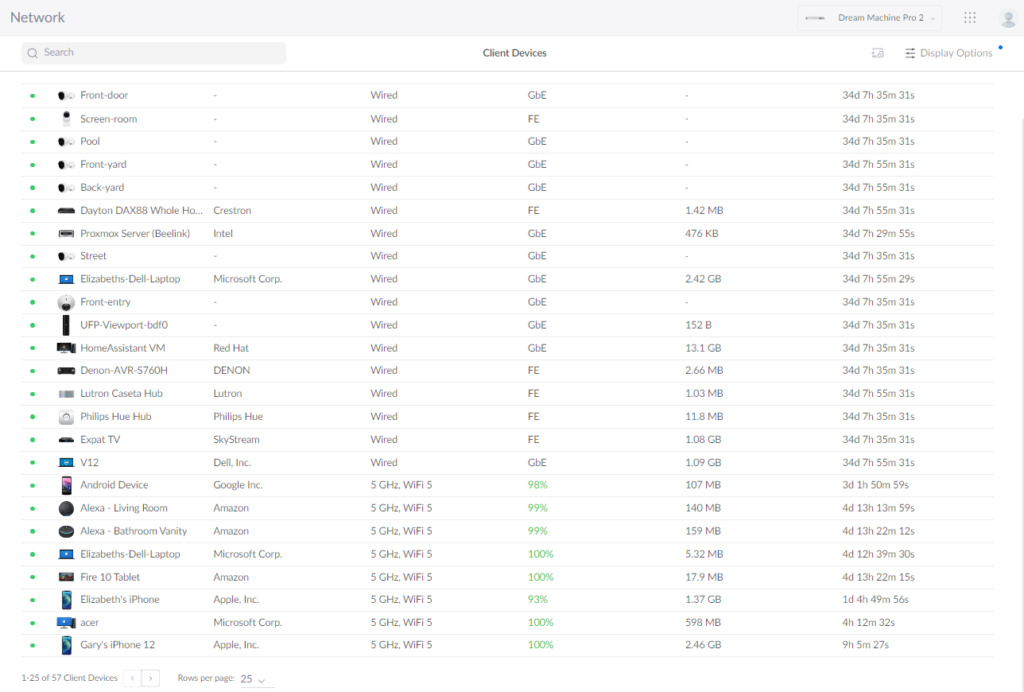
The insights that the UDM Pro provide are pretty cool. I can see everything connected to my network, how it’s connected, to which access point, etc. I get alerts when a new client connects (or attempts to connect), and I also get network threat detection alerts.
Network Speed
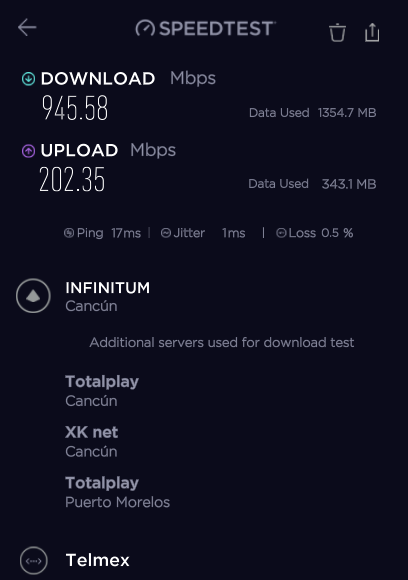
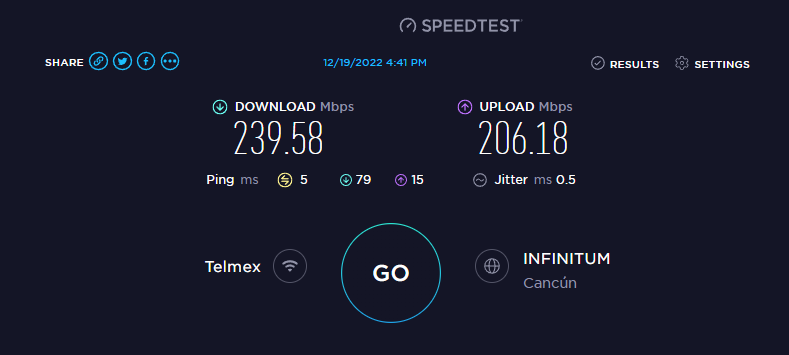
Our contract with Telmex is for 1GB, and when using a wired connection, I get pretty close to that on my laptop. Slower using WiFi in my iPhone, but still respectful.
Do I need all this?
No, of course not. Like I said, I probably went a bit overboard. It’s all a big step up from the previous Google Wifi mesh system that we had a few years ago. But it is pretty kick ass, and I’ve learned a lot of networking stuff along the way.
I recently helped out a friend here, and we simply added 2 Unifi Nano HD access points, and connected directly to his Telmex modem. You don’t get all the control that a network appliance gives you, but it allows for extending your WiFi, and it worked out great for him.
We don’t know exactly what the future will bring, but more and more devices are network connected, so having available connections, and available conduit, is a good bet for the future.
That is a great setup and better to go overboard than have to upgrade later. I would have a better setup at home but for now, we still can’t get high speed fiber on our cul de sac, even though it is available a few blocks away. If we ever build a home or move to a newer place that might hopefully have some prewiring done, then I will definitely have something more like yours.
Glad you guys are enjoying it down there and congrats on such a great new home.
Take care and almost Happy New Year. 🙂
Thanks Kirk!
Crazy that you still don’t have fiber in your area yet. Bummer.
Hope is all with y’all – and happy new year!
I have a log cabin with radiant heat in the floors along with a Ubiquiti USX, key and USG with many access points through the cabin. We recently bought a home in San Miguel and are putting in the Dream Wall in it. Your website is very impressive. I would like to talk with you if possible. Telmex is not an easy firm to deal with!
Please let me know how we can communicate? It may be that your home is in San Miguel.
Regards,
Rob
Hi Rob,
We are in Puerto Morelos, not San Miguel.
You can drop me an email at gsherman at gmail dot com